For the second project in our Beginning Arduino series I decided to build an LED Light Bar (think of Knight Rider). This will teach us some of the basics of working with multiple outputs and it will allow us to build things like Christmas light decorations. We will also gain a good foundation for working with a 7 Segment LED which we will look at in a later date.
What we need:
- Arduino board
- Breadboard
- Wires
- 8 x 220 Ω resistors
- 8 x LEDs
It isn’t essential to have 8 LEDS/Resistors, you can have less or more you just need to have a resistor for each LED and a digital out on the Arduino.
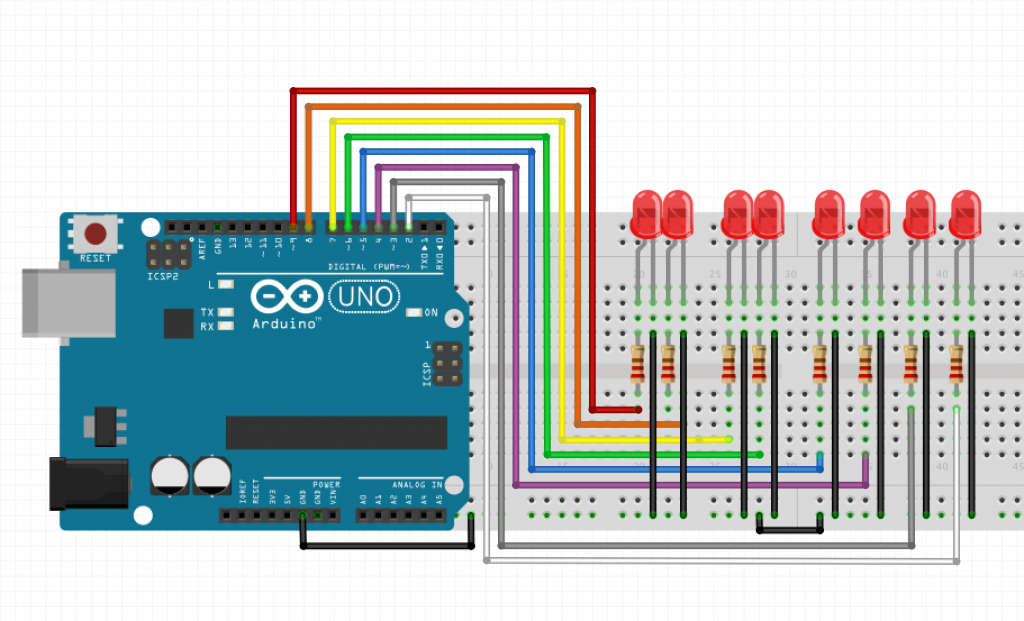
Put all the components together as shown in the image below

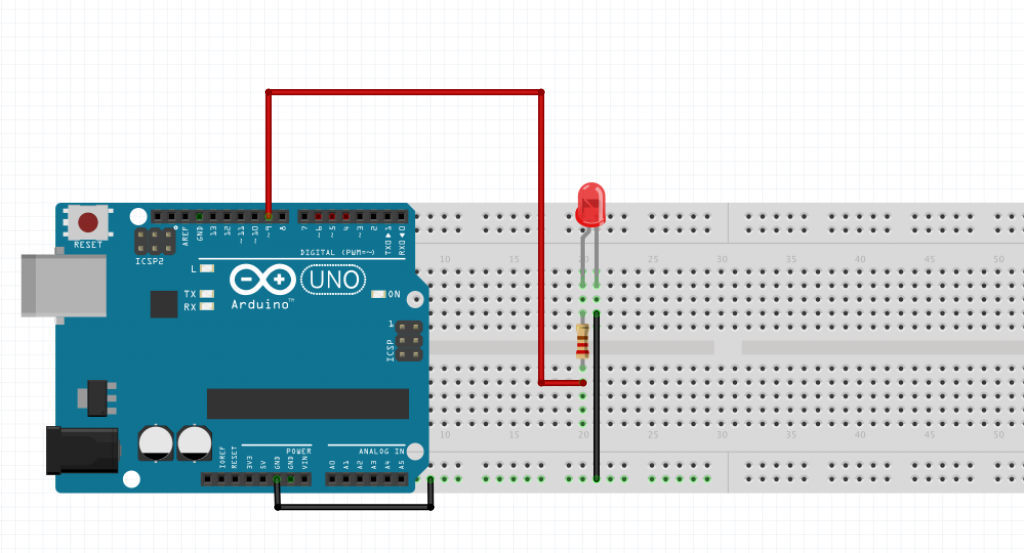
In case that circuit is a little overwhelming here is a circuit with just a single LED wired up. All the other LED’s follow the same layout but with their input from a different digital out on the Arduino.

Now fire up the Arduino IDE and create a new sketch with the following code:
[c]
void setup(){
//looping through the digital pins 2-9
//and setting the mode to output
for(int i= 2;i <= 9;i++){
pinMode(i, OUTPUT);
}
}
// Simple function to loop through all LEDs to turn them off
void turnLEDsOff(){
for(int i= 2;i <= 9;i++){
digitalWrite(i, LOW);
// wait 200ms
delay(200);
}
}
//main loop
void loop(){
// move through the LEDs lighting single led at time
for(int i= 2;i <= 9;i++){
//turn off All LEDs
turnLEDsOff();
// turn on single LED @ position i
digitalWrite(i, HIGH);
// wait 200ms
delay(200);
}
// same as above but in reverse order
for(int i= 2;i <= 9;i++){
//turn off All LEDs
turnLEDsOff();
// turn on single LED @ position i
digitalWrite(i, HIGH);
// wait 200ms
delay(200);
}
}
[/c]
Plug in the Arduino to a power supply and There you have it, an LED Light bar.
Issues I experienced
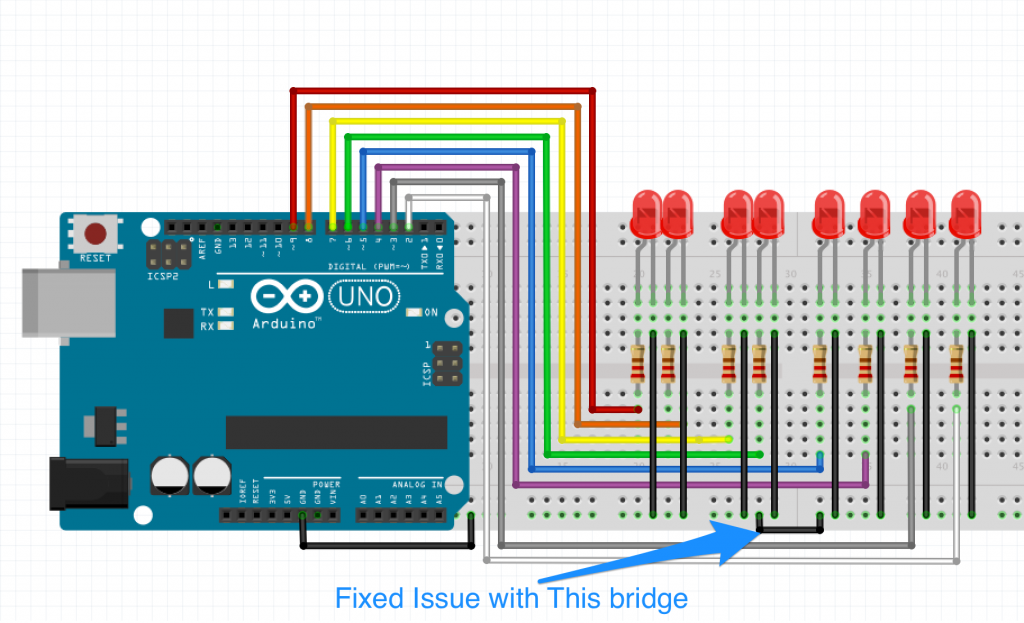
While doing this project I came across an issue where the last LED would not light up for me. I tried swapping LED’s, resistors and cables but found nothing was faulty. Could the breadboard of been faulty? Sort of, but not really. I basically didn’t realise the was a break in the ground rail on the bottom. So I had to bridge the break ( see the image below).

But Why did the other LEDs on the same side of the break work? Because when an IO pin is configured as an OUTPUT, and is set LOW, it is effectively connected to ground, allowing the rest of the circuit to behave as normal
Here is a video show this issue:
I based this tutorial on a post I wrote for my own blog and on the LED Light Bar project in Arduino Project Handbook